
|
|
#11
|
|||
|
|||
|
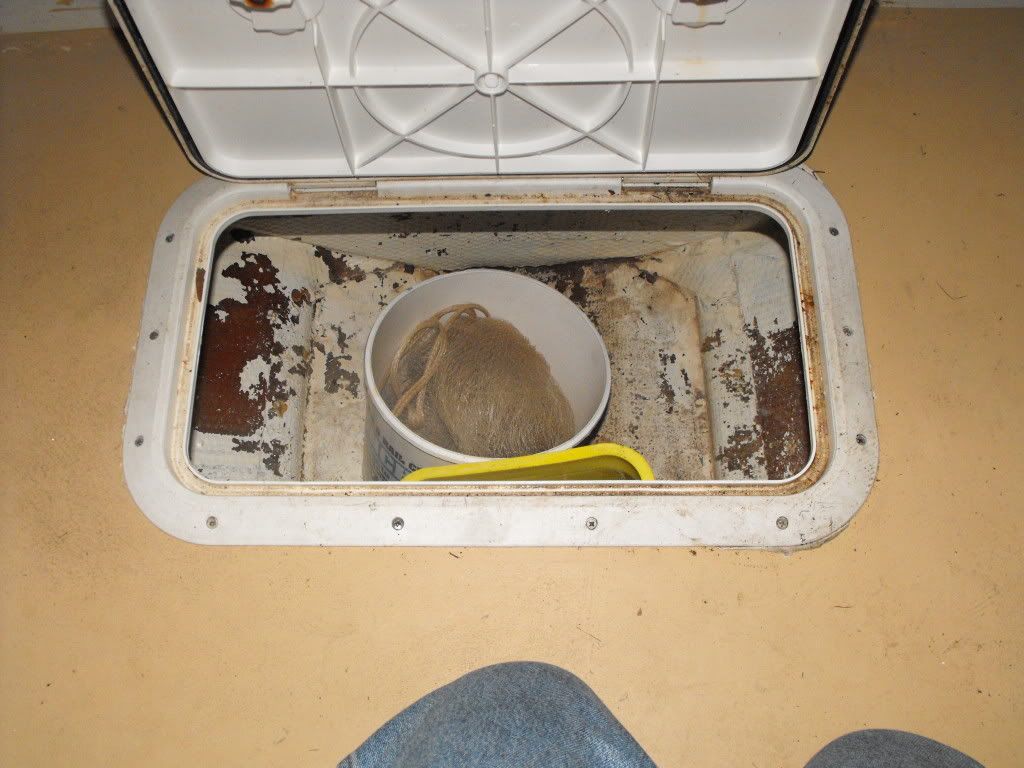
Good job , You will never see a drain for the Tank area as I posted before its reason.
You floor and below is the best I have sever seen , looks like it was not really soft ? As for the foam removal its up to you, Why not install a deck hatch and utilize all that wasted space next to the tank towards the transom ! Mine is setup the reverse of yours tank towards the transom and open area next to the cuddy 
|
|
#12
 07-11-2009, 04:37 PM
|
|||
|
|||
|
Yep after further inspection, floor was rotted only in the spots I noticed from the top. I will feel a bit better though knowing exactly what's up and thats a great idea on the hatch. Let me review my options to se what it would take.
|
|
#14
07-12-2009, 09:31 PM
|
|||
|
|||
|
I have read so many posts in the last 2 weeks that I don't remember where I saw it, but someone posted a website for where to buy those hatches. Done a bunch of searches and can't fint that thread now.
The discussion had to do with finding the flatest possible hatches so that they are as flush as possible with the floor. Also, I'm guessing that when I convert one of those holes to a hatch, I should be drilling through a drain to the center hull for the hatch to drain?
|
|
#15
07-12-2009, 09:41 PM
|
|||
|
|||
|
Quote:
Remember if you re doing the floor make your own 100 % flush hatch easy to do .. In regards to the drain mine drain everything with the exception of the fuel tank area ..
|
|
#16
07-12-2009, 10:13 PM
|
|||
|
|||
|
Sweet! So the blank hull areas should already drain... one less thing to do.
Definitely will consider adding a few hatches. Let me see on the option of making them level. I'm pretty new to glass work and i'm guessing that after routering the bevel to sink the hatch down the 1/4 or so, I will need to glass it over to avoid rot.
|
|
#17
07-12-2009, 11:05 PM
|
||||
|
||||
|
http://www.westmarine.com/webapp/wcs...Name%7C0?N=377 710&Ne=0&Ntt=deck hatch&Ntk=Primary Search&Ntx=mode matchallpartial&Nao=100&Ns=Manufacturer Name|0&keyword=deck hatch&isLTokenURL=true&storeNum=5000&subdeptNum=24 &classNum=487
i also got mine from west used the tempress. they last about 2/3 years and then crack because of the heavy traffic in front of the cabin door & kids jumping down from the cabin roof
|
|
#18
07-20-2009, 09:10 PM
|
|||
|
|||
|
Floor is moving along. Will be ready for wood in the next few days.
After removing floor it seemed to be more solid that expected, but after removing the glass and digging into the wood, the wood was much worse than expected as it was moist in most areas. Only 2 areas where is seems quite hard to remove from glass. Very glad I went with removing the whole floor instead of trying to piece repair it. Cut out the fish box and expecting to reuse it. Was expecting to work around it, but the wood between it and the deck was roted in some areas.
|
|
#19
07-20-2009, 09:46 PM
|
||||
|
||||
|
http://www.theburningreel.com/forums...placement.html
joe, saw this on another site, this is what i did with the string to get stringer heights close and check "plumb" of the deck.
|
|
#20
07-22-2009, 11:35 PM
|
|||
|
|||
|
Just got done in garage. Some beers
 with some help from my cousing and got the wood cut and adheared onto the deck cap. with some help from my cousing and got the wood cut and adheared onto the deck cap. I was trying to see how many items I can place on the wood to make it adhear evenly! Fertilizer, fuel, paint, cement, acid, pool salt, resin... If it had some weight to it, it was used! On to getting glass over the wood in next few days.
|
 |
|
|


 Linear Mode

