
|
|
#1
|
|||
|
|||
|
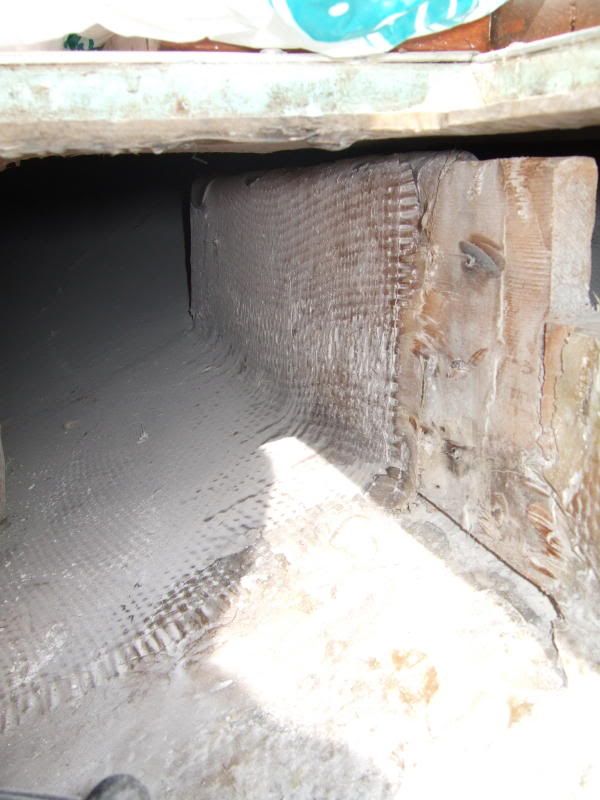
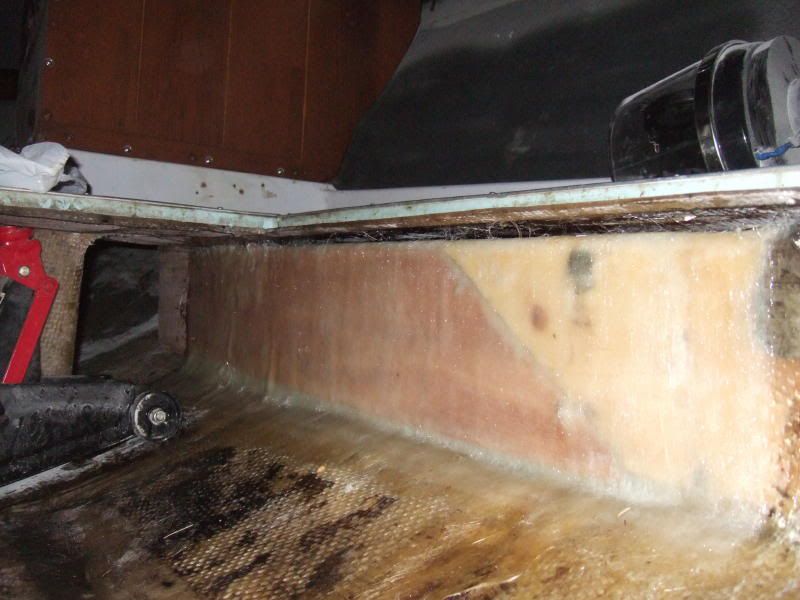
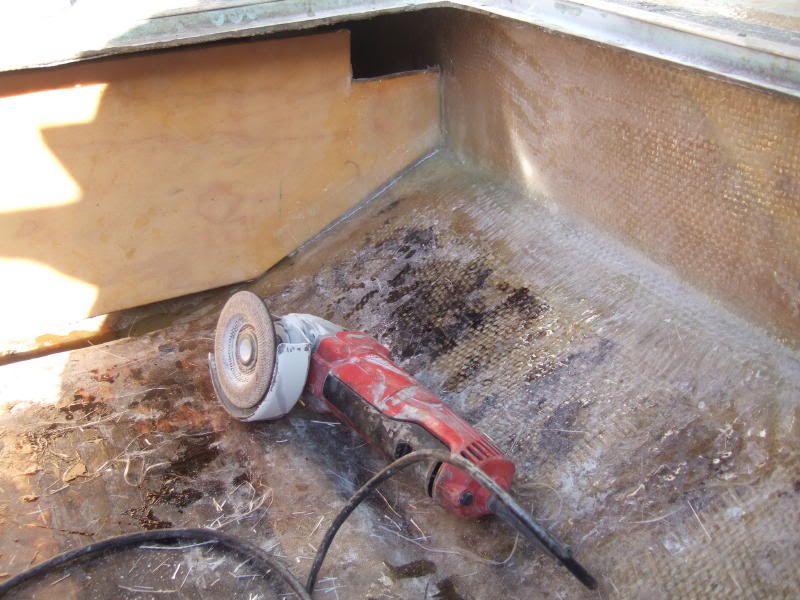
I pulled my burned up motor a few months ago and I'm working on putting a remanufactured long block together. *In the process, I figured I should check out the stringers that the motor mounts on. *A buddy came over and we started by drilling a hole between the old mounting holes, and the wood was dark and soft there. *The next step was to cut a strip out of the fiberglass on top, which exposed even more soft (rotting) wood. *So the cutting continued:
  The next thing we did was cut a cross section about 15" forward from the transom, and my worst fears came true:  These things are a total loss. Luckily, these pieces are fairly short (they stop at the first bulkhead), so we completely removed both of them, and will start from scratch. * I bought a beam remnant at the lumber yard that I think is perfect. *It is a product called "glue lam", which is basically several 2"x4" boards stacked on top of each other and glued together to form a beam. *They are cured before they are glued, so there shoudn't be any warping later. *The piece that I bought had been exposed to a little rain this winter, but it was wrapped with plastic, so it held up pretty well. Here is the question: *Should I cut the new stringers should to fit tightly between the transom and the bulkhead? When I removed the old stringers, I noticed that they were both about an inch too short. *Was this intentional? *I don't think they shrunk after they were glassed in. *They look like they were installed that way, because on both ends there was a gap where they attached and there was an indentation where the fiberglass cloth had been contoured around it. *Maybe this is a structural thing that I don't understand? *Maybe this allows the stringers to expand? *Any ideas? Note: *The stringers that I removed were made of two 2"x8" boards that were nailed together. *As you can see from the photos, this put the mounting screws right in the seam between the boards. *I think this is a really poor design, because the worst rot was between them. *You can also see that from the cross section photo. *However, most of my rot came from the bottom, so I think there were some voids in the fiberglass too, and too much water in the bilge (the previous owner didn't even have a bilge pump installed!). Thanks in advance for your advice.
__________________
Olivia Grace - 1980 Stern Drive Cuddy 
|
|
#2
 04-29-2007, 04:40 PM
|
|||
|
|||
|
I can't help you on the stringer question, but I wanted to say GOOD JOB tackling such a project.
The "wise guys" will be along soon and help you out.
__________________
*************************************** Stay Safe!  Sold - 1984 V-20 Cuddy with a 2003 Johnson 140 hp gas sippin 4-stroke. 1995 Ranger 250C with a 2015 Suzuki 300 hp 4-stroke.
|
|
#3
04-29-2007, 07:58 PM
|
||||
|
||||
|
I would cut them to be barely snug. kools can telll ya how to glue them in prior to glassing. When I had mine done I had a 1" hole drilled thru each one. My cockpit drains were on the outside of the stringers and wouldn't let water drain to the garboard drain. Water would finally spill over, but it got sucked into the fiberglass and stringer *(fiberglass ain't waterproff.) Be sure to predrill the stringer for the motor mount bolts. and seal them with 5200
__________________
I have been through some terrible things in my life, some of which actually happened.
|
|
#4
04-29-2007, 10:20 PM
|
||||
|
||||
|
The beam sounds nice, but what kind of glue?? If it isn't a water proof glue holding it toghter it will be junk in short order!!
if was me I would make up a new stringer and seal with resin before all the way around before putting in place. I aslo would make it a pretty tight fit! Keep up the good work!!
__________________
1986 V20  Old Fishermen never die, we just SMELL that way!!
|
|
#5
04-30-2007, 12:29 AM
|
|||
|
|||
|
I replaced part of a stringer, it was fairly easy. *If you're not removing the whole stringer, make sure you scarf the joint. *I used thickened West System to bond everything and then laminated with 2 layers of 1.5 oz mat and 1 layer of 24 oz. roven. *The work was really not very hard except I had to cut a hole in the deck for access to the other side of the stringer. *I used douglas fir to make the stringer. *I would shy away from laminated woods not intended for marine use because moisture can break down the glue. *Doug fir is cheap, I paid $16 for an 8' 1x8. I don't know about the gap to the transom. I see that a lot but I also see people putting knee braces against the transom in order to strengthen the boat.
|
|
#7
05-02-2007, 03:50 PM
|
|||
|
|||
|
Those stringers look fine! Even if the wood completely rotted out the shell of the glass around the wood is plenty strong enough to support the deck and the hull. So just replace the section of wood your going to lag bolts into.
This is how oceanmaster and the old seacraft stringers are built.  as long as the glass hasn't delaminated from the hull you don't need to worry.
__________________
1971 222 Hiliner 1973 23 Seacraft Center Console 1973 23 Seacraft Sceptre 1971 25 Seacraft Seafari 1972 28 Cary
|
|
#8
05-02-2007, 07:30 PM
|
||||
|
||||
|
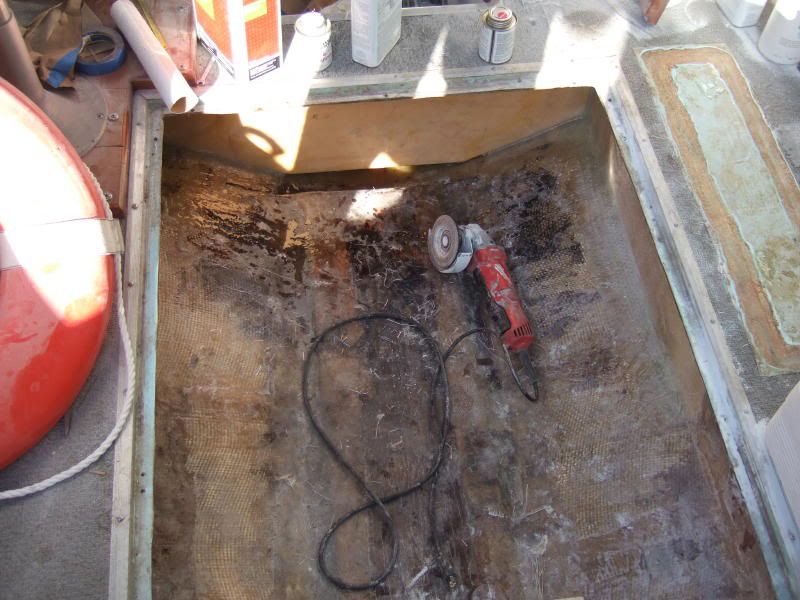
BiG...While I love that last picture you posted, it scares the devil out of me at the same time. Thats some major surgery being done.
__________________
Airslot Airslot's V-20 Gallery
|
 |
|
|


 Linear Mode

