
|
|
#1
|
|||
|
|||
|
Ok, this is the next project to do. Gotta cut out this section of the deck because it's soft. I think its because the fuel tank is under it. >:(
As far as the tank goes, gotta figure out if the tank is good or not. Any signs to look for besides gaint holes ??? 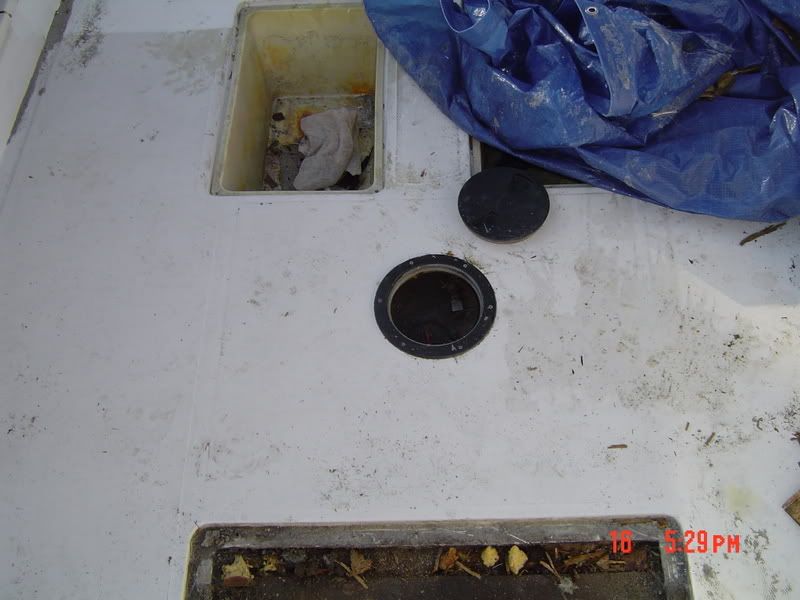
__________________


|
|
#2
 10-31-2007, 12:05 AM
|
|||
|
|||
|
Gonna cut between the two stringers and between the bulkhead, screw in the new piece of wood to the stringers, along with using West System to resin the new wood to the topside and underside of the skin.
__________________
|
|
#3
10-31-2007, 12:11 PM
|
||||
|
||||
|
In the gas tank, take the fuel level sending unit out
and look at the gas, if you see crud on the bottom of the tank, you will be sure that it will clog your filters. Did you notice all the empty space in front of the tank? I cut my cover in half, hinged it and now I have a nice anchor hold. I would post pics, but my work changed servers and now Photobucket is one of the sites that they block. Oh yeah, to clean the crud out of the bottom of my tank, I made a homemade pump from a cheap WEST plastic hand operated bilge pump. If you want to borrow it, it is under my trailer were I keep the lawnmower.
__________________
  Bottom's up!!! Bottom's up!!!
|
|
#4
10-31-2007, 03:32 PM
|
|||
|
|||
|
HAMMER:
MY TANK IS A 1978 BUT I'D HATE TO TOUCH IT, THAT'S A MAJOR PROJECT, SINCE I DON'T SMELL ANY GAS, I INSTALLED 2 WATER SEPARATORS IN LINE AND I CHANGE THE FIRST IN LINE EVERY SECOND TIME I GO OUT AND THAT WAY I'LL KEEP SH...T OF THE CARB. LESTERUS
|
|
#5
10-31-2007, 04:20 PM
|
||||
|
||||
|
when you get the tank out have it persure tested, but beware, its good now leave it alone! you don't want to open a can of worms!!
Leave that for the next guy!!
__________________
1986 V20  Old Fishermen never die, we just SMELL that way!!
|
|
#7
10-31-2007, 10:14 PM
|
|||
|
|||
|
Parisht, you now have me wondering. How did you cap the ends where you made your cut, or did you install maybe some sort of rubber flapper over the cut seam.
Hook me up with some pics bro. Unless your V is uncovered, I'll go and check it out. It does suck giving up all that waisted space.
__________________
|
|
#8
11-01-2007, 11:02 AM
|
||||
|
||||
|
I cut the hatch right at the wood cross stringer.
Then I added a piece of pressure treted 2 X 4 to the plywood, to help support the hatch at the hinges. As far as the ends, I bought a can of the paint for plastic chairs and such then really laid it on thick. I'll e-mail some pix as I Photobucket is now blocked here at work.
__________________
Bottom's up!!!
|
 |
|
|


 Linear Mode

