
|
|
#21
|
||||
|
||||
|
Nice work, Kracker...lookin' good...can't wait to see to progress on this...

__________________
'74 V-20/ BF 150 '95 V-21/ BF 150 '84 V-20/ 200 2.4 Merc '87 V-20/'18 F150 Yamaha 

|
|
#22
 10-08-2011, 07:29 PM
|
||||
|
||||
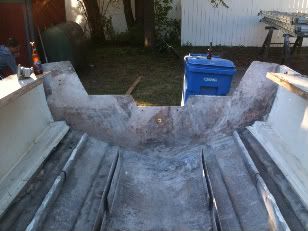 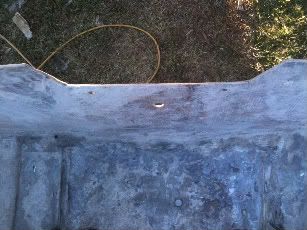 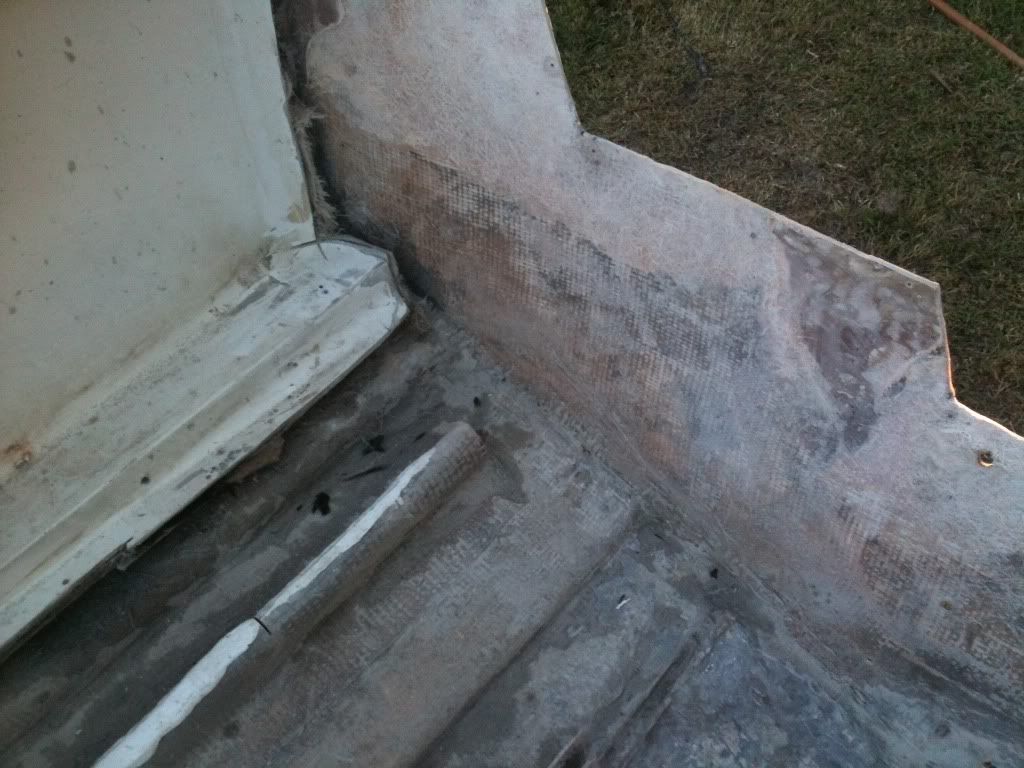  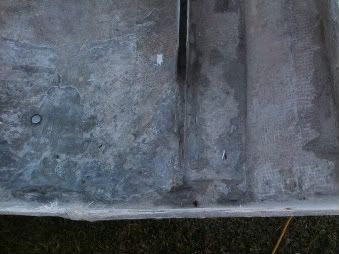 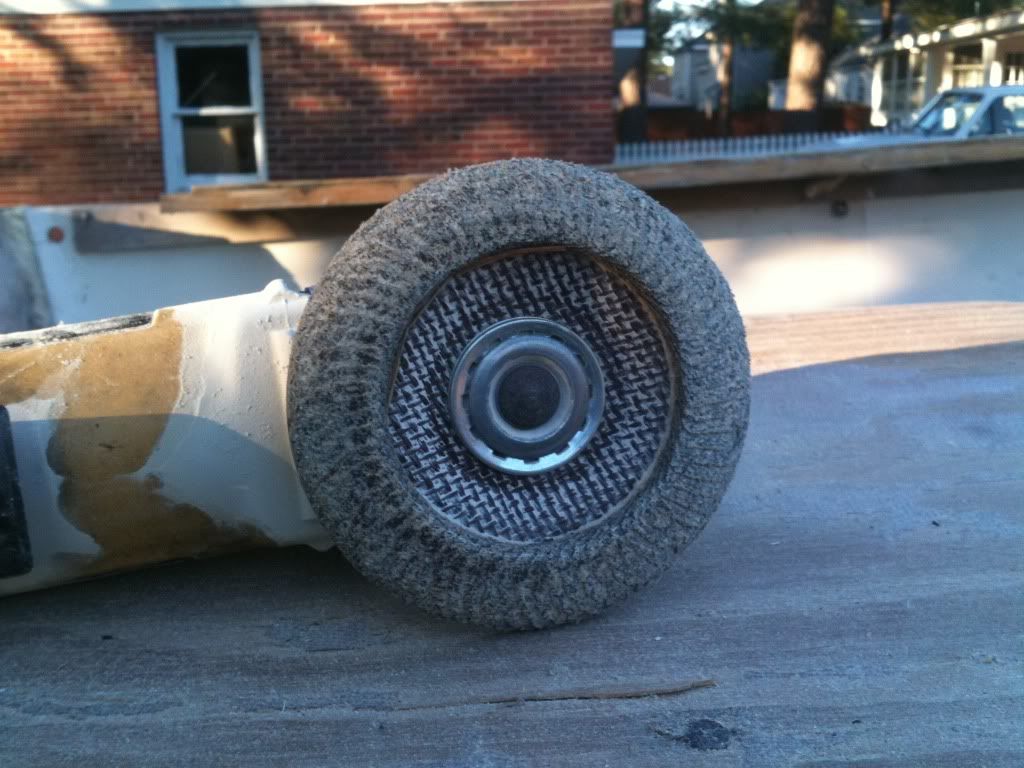 [IMG] [IMG]Well I removed the old transom today.And started prepping it for replacement. I highly recommend anyone doing this kind of job to purchase the sanding disc like the one I have on my grinder, I t makes quick work for prepping the transom. I have some questions for you guys, Should I lay up some mat on the transom before i laminate the first piece of ply ? should I just roll the resin on factory skin and then laminate? Or should I thicken resin then trowel on and then laminate? I have read that all methods have been used, Im just looking for the strongest.
|
|
#23
10-08-2011, 07:49 PM
|
||||
|
||||
|
Is there anyway I can move this thread over to the repair section? or is it ok to keep posting here?
|
|
#24
10-09-2011, 06:21 AM
|
||||
|
||||
|
Quote:
For my money you can leave it right here...this is GREAT!!...if this work ain't on point,I don't know what is... Keep it up!!...gonna be fun to watch... If I can make another suggestion...my old '74 had the single drain hole centered in the splashwell as yours does...while you are about making improvements, you might think about closing that up and putting two drain holes to each side of the motor...the 1st motor I had on that boat blocked that center location and was a constant PIA...that was the subject of my 1st post here in 2003...MacoJoe jumped my a$$ and said JUST DO IT!!...
__________________
'74 V-20/ BF 150 '95 V-21/ BF 150 '84 V-20/ 200 2.4 Merc '87 V-20/'18 F150 Yamaha
Last edited by reelapeelin; 10-09-2011 at 06:30 AM.
|
|
#25
10-09-2011, 08:36 AM
|
||||
|
||||
|
no wonder transoms rot out in these rascals so soon if there not done right, the bilge holds water 3 or so inches deep and can not drain. so should I keep it the same height as the sump box, or should i drop the height a little so that it drains more efficiently?
|
|
#26
10-09-2011, 10:34 AM
|
||||
|
||||
|
I found putty next to the factory skin on my 1983. I did the putty and transom clamps on mine. I used matt on hatches where the skin was laid out on a work table and the core and skin were perfectly flat and it worked great. The transom is anything but flat on the Wellcraft so putty is easier IMO. Both ways will work. Laying glass in the corners of the transom where you still have a little of the inner skin (due to the floor being in the way and such) will prove very difficult. Putty could be easily troweled into tough spots, fabric can be used to laminate the plywood together for the core. I made a three piece transom out of core material because my transom had such a curvature. The wings were laid first and the overlapping center core was clamped in place last. Putty was oozing out around the perimiter everywhere. Put the gloves on and wiped the excess with my finger (like it was caulk) to form a radius on all the transitions (filleting). After it kicked it made laying the inside skin a breeze. I did the same across the top of the core because I made the 83 a full transom where the core stopped a few inches from the top of the transom. You need to add quality fiberglass to the places you intend to extend the transom height. Fairly critical because you are going to be hanging the motor from that area.
Single scarf ========\ \________________/ /=============== BEST Double scarf ======> >=============< <============== Double scarf requires work inside the hull before adding core. Google scarf joint for a better visual. The stringers look gone at the stern, what about the rest of them?
__________________
 1996 -19' NV Flats 115 Mercury 4-stroke 1983 -20' Wellcraft Center Console 250 XS Last edited by RidgeRunner; 10-09-2011 at 10:40 AM.
|
|
#27
10-09-2011, 11:07 AM
|
||||
|
||||
|
Im replacing the stringers also. they have been removed and are being set up as we speak
|
|
#28
10-10-2011, 06:59 AM
|
||||
|
||||
|
You are fast. Looks like destruction and prep are not a problem for you. Great thread. Great pictures.
__________________
1996 -19' NV Flats 115 Mercury 4-stroke 1983 -20' Wellcraft Center Console 250 XS
|
|
#29
10-10-2011, 08:09 AM
|
||||
|
||||
|
Quote:
The only hole I see in the pics is the drain hole for the SPLASHWELL...on second look, I don't even see a bilge drain hole...that should be no more than an inch or less above bottom of bilge... Is pouring w/Arjay a consideration on the stringers?...not an encouragement to go so, just a question...
__________________
'74 V-20/ BF 150 '95 V-21/ BF 150 '84 V-20/ 200 2.4 Merc '87 V-20/'18 F150 Yamaha
|
|
#30
10-10-2011, 01:12 PM
|
||||
|
||||
|
I plan on putting in a bildge drain plug. do i need a splash well plug? im doing a traditional stringer system. ridge i guess im gonna cut the sides back and then glass them in when i do my progresive lap around the sides.
|
 |
|
|


 Linear Mode

