
|
|
|
|
#1
|
||||
|
||||
|
If'n one was to pretreat, you would have to apply the second coat within a certain time period, before cured, to make a good chemical bond. That's why it would need to be a morning start. Have to sit there with a beerskie touching the goo every so often so as not to miss the window of opportunity ;)
So anyway, that's all water under the keel now. I'm done! I'm not the least bit happy with it though. Remember those unbonded pockets I referred to earlier? Well, they sound like I'm going to break the dang thing as I walk on it, snap crackle pop. Only where the bond isn't good. It seems plenty strong though, I can walk on it without it sagging. So that's good I guess. The Phatdaddy mod didn't work out so good for me either. Not what you would expect though. I went ahead and bonded the blocks of wood with the 4200, but instead of putting the lid on there, I eyeballed the alignment and drove the screws right in until it cured. That worked just fine. The problem came once I ran my bead of silicone all the way around the opening and set the lid in place. 3 out of the eight Tee nuts didn't stick into the wood!!!! As I put my screw in, they popped out the back side of the block. HOLY CRAP!!!! Well, I didn't pull the lid back up. Ta hell with it for now >:( I needed to get it back together to take the family out tomorrow, and it's done enough for that. I'll post my pics later on after I have a chance to cool down.
__________________
http://i29.photobucket.com/albums/c2...ny/propell.gifhttp://i29.photobucket.com/albums/c2...oke-Engine.gif&& 
|
|
#3
 05-26-2007, 07:37 PM
|
||||
|
||||
|
Dat's what I'm talkin about! ;)
__________________
http://i29.photobucket.com/albums/c2...ny/propell.gifhttp://i29.photobucket.com/albums/c2...oke-Engine.gif&&
|
|
#4
05-26-2007, 07:46 PM
|
||||
|
||||
|
Bummer on the T-Nuts fallin' thru...happened to me B4, but I was able to get 'em...w/ no nut to hold 'em, just fill the hole w/4200 and seat the screw in there ... it'll look right and seal the hole ...that hatch-lid ain't goin' anywhere ;) ...
Can you tell exactly where the air-pockets are ... if so, drill 1/8th or so hole in the center of the pocket(this in the groove between non-skid), take a hypodermic syringe and inject the hole w/resin...let cure, then drill out just enough to hold some filler ... you'll never see 'em ...and the noise will go away 8) ...go enjoy the boat...ya did a good job ;) ;D ;D ;D ... Do the above later on...take your family out and enjoy the weekend ;) ;D ...
__________________
'74 V-20/ BF 150 '95 V-21/ BF 150 '84 V-20/ 200 2.4 Merc '87 V-20/'18 F150 Yamaha 
|
|
#5
05-26-2007, 09:20 PM
|
||||
|
||||
|
sorry frayed, hope i didn't lead you astray. the tee nuts only get a grip when you sink them into the wood. i tapped mine in with a hammer to the blocks of wood about the size of a business card. gooped them with the 5200 and set them in place. then i lightly laid the deck plate on and got the screws started. once i got them all started i went around and tighten then like a head gasket. sorry if i messed you up
anyway, like mj & rap say, just go use it.......
|
|
#6
05-26-2007, 09:48 PM
|
||||
|
||||
|
Don't worry about it phat, it is a great idea and one that I will make work next time I have the lid off. I did tap them in with a hammer though, and they had pressure on them for a few hours. I have no idea why they did what they did. This winter I'll take those blocks back out and replace them with some blocks coated in resin. I'll make sure the tee nuts are resined in this time ;)
__________________
http://i29.photobucket.com/albums/c2...ny/propell.gifhttp://i29.photobucket.com/albums/c2...oke-Engine.gif&&
|
|
#7
05-27-2007, 12:28 AM
|
||||
|
||||
|
As promised, pics! :D
Here is the completed hatch cover. I had to replace the deck plates and could only find white ones. It works. 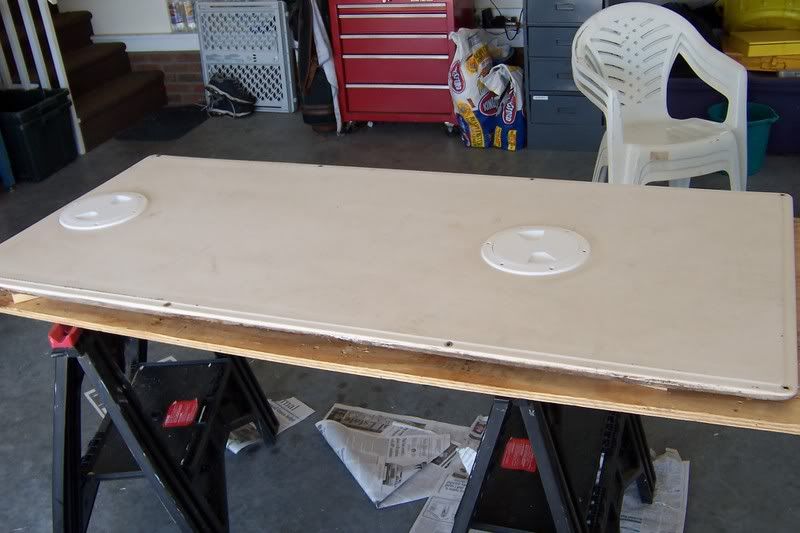 The fuel tank after it's new coat of primer 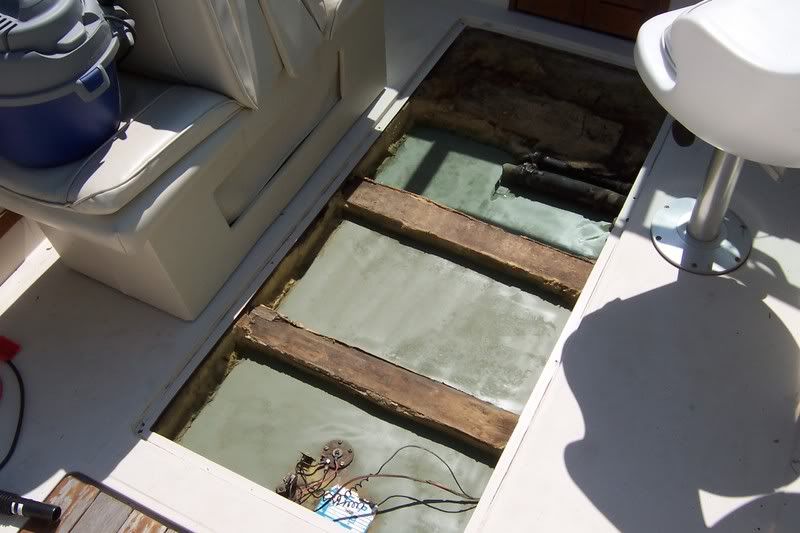 The Tee nuts 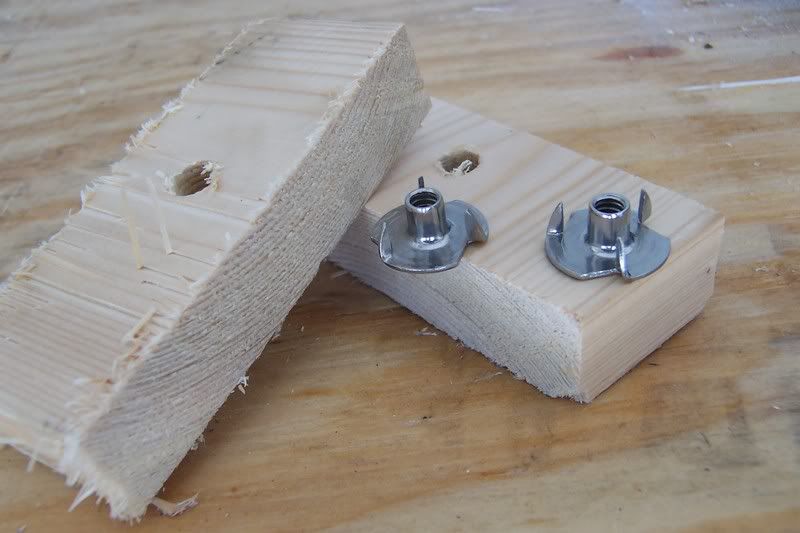 
__________________
http://i29.photobucket.com/albums/c2...ny/propell.gifhttp://i29.photobucket.com/albums/c2...oke-Engine.gif&&
|
|
#8
05-27-2007, 12:33 AM
|
||||
|
||||
|
Here is how I mounted them while waiting for the 4200 to setup
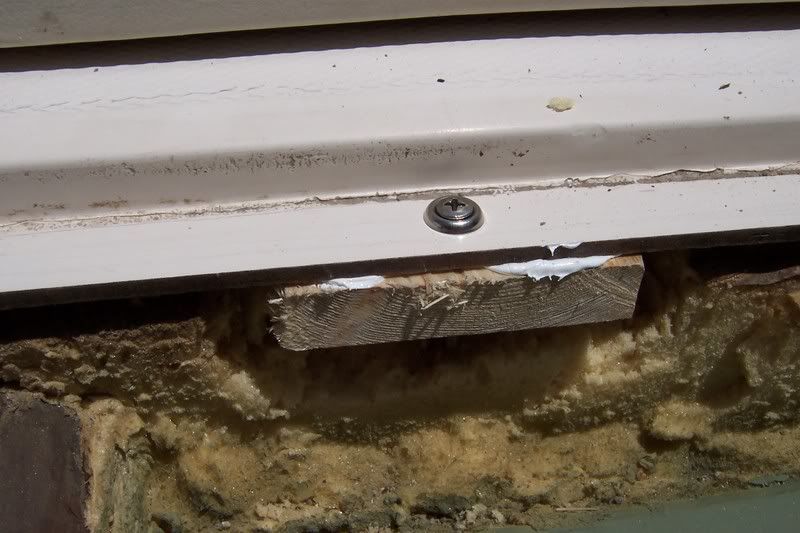 The two at the very front I had problems with. The way the holes were drilled put them too close to the front bulkhead so the block of wood couldn't be mounted up there. Here you can see where the bulkhead is. I drilled 2 new holes and mounted the blocks farther aft. 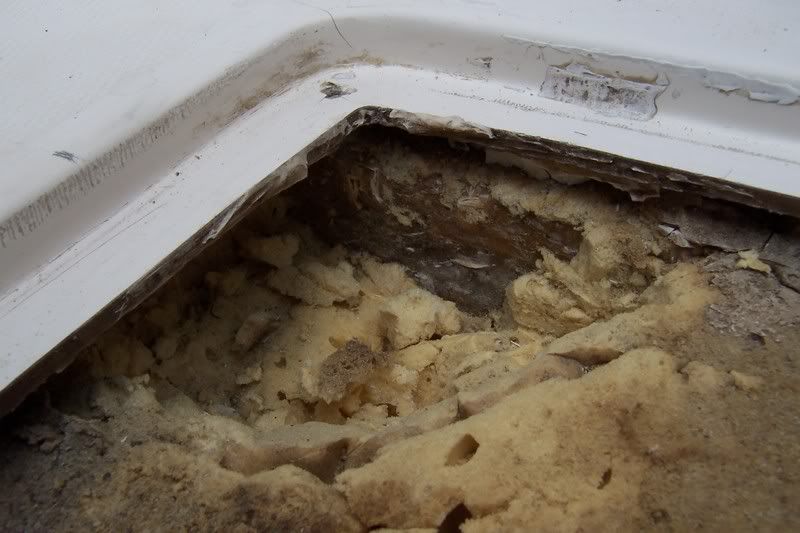 Here is the completed ( ? ) project. The silicone was skinning up real quick, so I had to fill the cracks and smooth them out in sections. 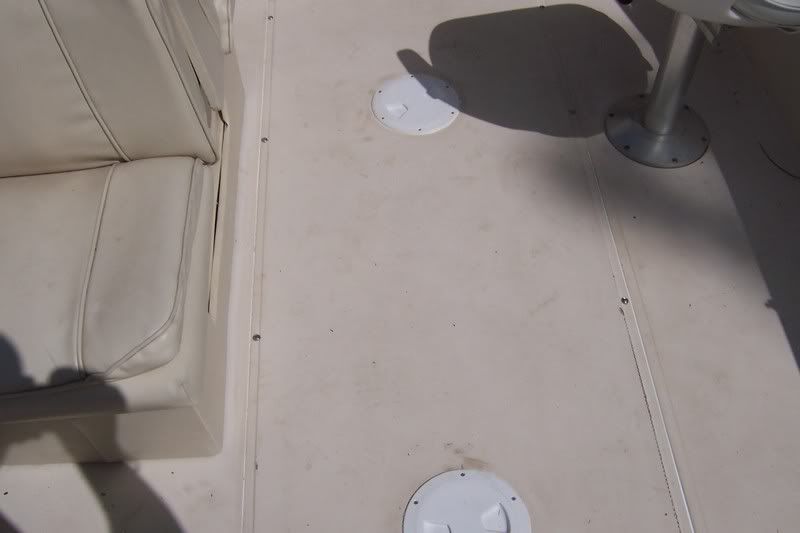
__________________
http://i29.photobucket.com/albums/c2...ny/propell.gifhttp://i29.photobucket.com/albums/c2...oke-Engine.gif&&
|
|
#9
05-27-2007, 12:34 AM
|
||||
|
||||
|
looks great pick me up lets fish. ;D
__________________
 1978 V20 Cuddy w/ 225 Johnson. And Several other boat's
|
|
#10
05-27-2007, 12:38 AM
|
||||
|
||||
|
Aiight!! ;D
There was a 17 lb striper caught in New Bern this week!!! Probably one of the biggest ever caught in the Neuse river.
__________________
http://i29.photobucket.com/albums/c2...ny/propell.gifhttp://i29.photobucket.com/albums/c2...oke-Engine.gif&&
|
 |
| Thread Tools | |
| Display Modes | |
|
|


 Hybrid Mode
