
|
|
#11
|
||||
|
||||
|
new pics loaded up at the end of page 1

|
|
#12
 10-05-2011, 05:00 AM
|
||||
|
||||
|
Kracker...was that boat converted from a cuddy???...the well in the front...I don't recall seeing that in a CC whereas it is in all the cuddys of that vintage...and the tops of the gunwales are flatter and much wider than standard CCs...I like it...gives the boat a real updated look and should be very functional one you're fishing her...
Are you gonna stay w/that motor?...I hate to add to an already full To-Do list, but rebuilding that transom as a 25"er rather than the 20"er it is now would pay off big in the future...if staying w/that motor, of course it would mean finding a 25" mid section, but IMO it'd be worth it... Most floors I've seen removed are cut along the outside edge...is there a fuel tank under there?...
__________________
'74 V-20/ BF 150 '95 V-21/ BF 150 '84 V-20/ 200 2.4 Merc '87 V-20/'18 F150 Yamaha 
|
|
#13
10-05-2011, 07:37 AM
|
||||
|
||||
|
Quote:
Pay attention you old geezer.
__________________
1986 V-20 1986 Yamaha 150 HP
|
|
#15
10-05-2011, 08:52 AM
|
||||
|
||||
|
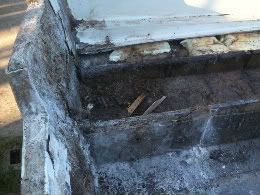
The caps added really give it that carolina look. but the idiot po used half inch ply instead of 3/4 ply. im gonna laminate with 3/4 over existing, is that to much weight? or should i just laminate over existing 1/2 inch with 1/2 ? she also runs twin 20 gallon rear saddle tanks, is that gonna be an issue with weight in the rear? i am gonna make it a 25 inch transom. what kind of mods. do i have to do to my lower unit besides the spacer? shaft extension?how cost is in the lower unit extension?
|
|
#16
10-05-2011, 09:28 AM
|
||||
|
||||
|
I've got a much better idea. Just trade me that Albe even Steven for my V21 and save yourself some time. It should fit nicely in my garage.
Sorry, I'm not much help with your quesitons but had to get that off my chest. Best of luck with your project.
__________________
 1994 Wellcraft V21
|
|
#17
10-05-2011, 09:01 PM
|
||||
|
||||
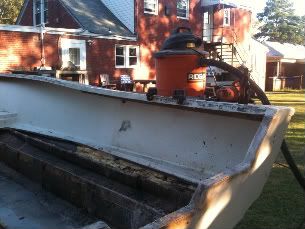
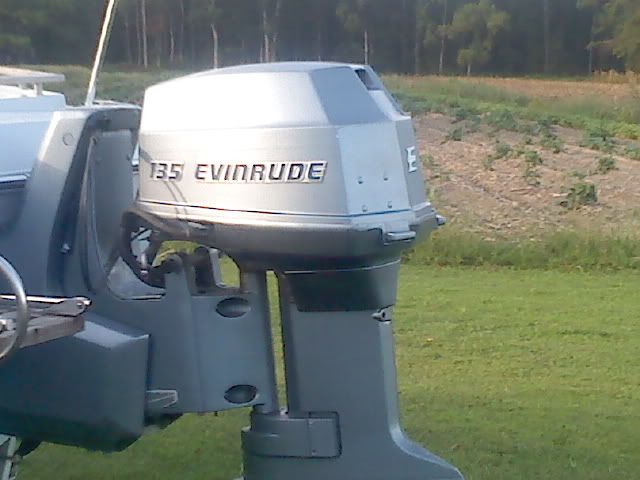 Here is my power plant. A 1979 135 that has very very very very low hours. I am only the third owner of this motor, my dad was the second owner and a good friend of my dad was the first owner. My dads friend david never used this motor at all, as been decribed to me by david is that he only ran this motor 40 or 50 times. my dad owned it for 5 years and used it 4 times. I have owned it for 4 years and can say i have only used it 20 to 30 times. do the math fellas!!! how many hours are truelly on this 79' ? I painted it 3 years ago yamaha blue because i had some spray cans left over from painting my 200 yamy on my seaox.The seadrive bracket you see this motor on has only been run in fresh water since 1985. my question is should i use the bracket? should i make it 25 inch transom and find a gimble bracket with power trim tilt? or should i keep her old old school and put her on the gimble bracket that has the manual tilt? I want simple!!! i want functional!!! this motor is running 132lbs. on all cylinders. give me some advice fellas. Here is my power plant. A 1979 135 that has very very very very low hours. I am only the third owner of this motor, my dad was the second owner and a good friend of my dad was the first owner. My dads friend david never used this motor at all, as been decribed to me by david is that he only ran this motor 40 or 50 times. my dad owned it for 5 years and used it 4 times. I have owned it for 4 years and can say i have only used it 20 to 30 times. do the math fellas!!! how many hours are truelly on this 79' ? I painted it 3 years ago yamaha blue because i had some spray cans left over from painting my 200 yamy on my seaox.The seadrive bracket you see this motor on has only been run in fresh water since 1985. my question is should i use the bracket? should i make it 25 inch transom and find a gimble bracket with power trim tilt? or should i keep her old old school and put her on the gimble bracket that has the manual tilt? I want simple!!! i want functional!!! this motor is running 132lbs. on all cylinders. give me some advice fellas.
Last edited by Kracker Jack; 12-19-2011 at 07:57 PM.
|
|
#18
10-05-2011, 09:20 PM
|
||||
|
||||
|
It would be nice to do away w/all the weight of the original bracket if you can...and you can lengthen the shaft two ways...find a spacer or a longer mid-section...either way will get the job done...

__________________
'74 V-20/ BF 150 '95 V-21/ BF 150 '84 V-20/ 200 2.4 Merc '87 V-20/'18 F150 Yamaha
|
|
#19
10-05-2011, 09:34 PM
|
||||
|
||||
|
so no bracket. and build the transom to a 25 inch transom? Sounds like a winner to me. I was kinda pushing away from the bracket. I can use it to sell and fund more of my project!!or use it to sell and fund the cost of the mid section.
|
|
#20
10-07-2011, 07:30 PM
|
||||
|
||||
  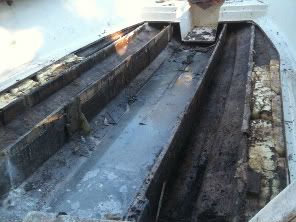  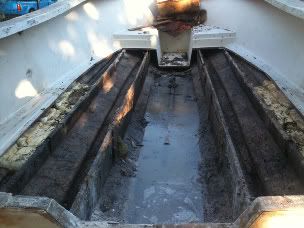 Demo went good today,only took me an hour to demo the floor circular saw really does a dosey on the floor and makes it it a cinch to remove, just set the depth and start cutting. As you can see in the pics I cut the floor up to the step and recess which used to be the entrance to the cuddy. What my plans are for that is to glass the step up flush and make it a storage with a drain hole with a removable hatch. I kept the other fish boxes so i can prep them and use them when I set up my new floor and glass them in. I can tell that this build is gonna be a blast!!!!! All comments and recommendations are welcome.
|
 |
|
|


 Linear Mode

