
 |
|
#1
|
||||
|
||||
|
Finally getting around to replacing the port saddle tank. It had 3 pinholes that I patched almost a year and a half ago. Intend on going on a couple of week long hunting trips on one of the barrier islands with the V this year and was not wanting any surprises while returning from camp, such as a bilge full of gas, figured it was time.
I looked for a couple of weeks for replacement options. Best bet was to send the tank to the fabricators and have one built, most likely well over $400 after shipping. Another option was to replace with a readily available one and modify the V to handle the changes. Well, that is what I ended up doing. I ordered an 18 gallon tank, with shipping less than $175, itís a little wider and taller than the original 20 gallon one but not as long. There was a 24 gallon one available but it was even wider, taller and longer than the 18. 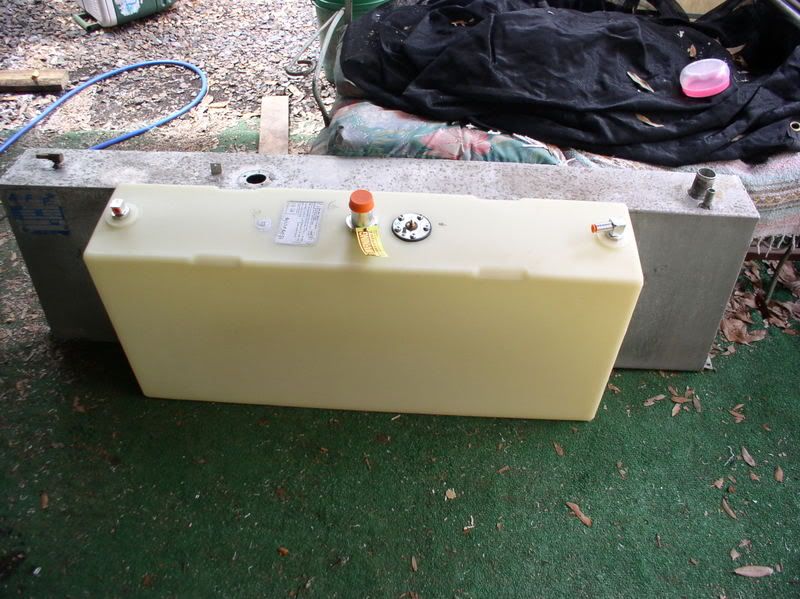 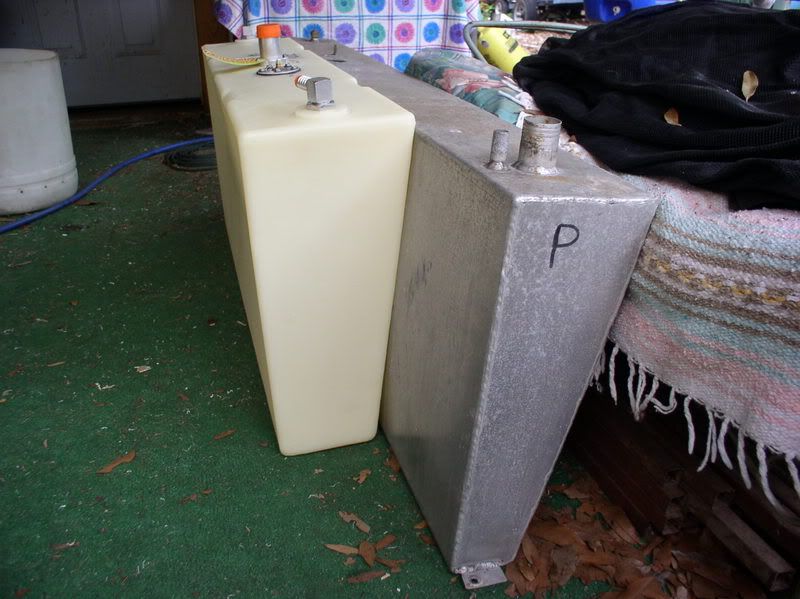 Checking to see how much fabricating Iíll have to do with the tank in place. 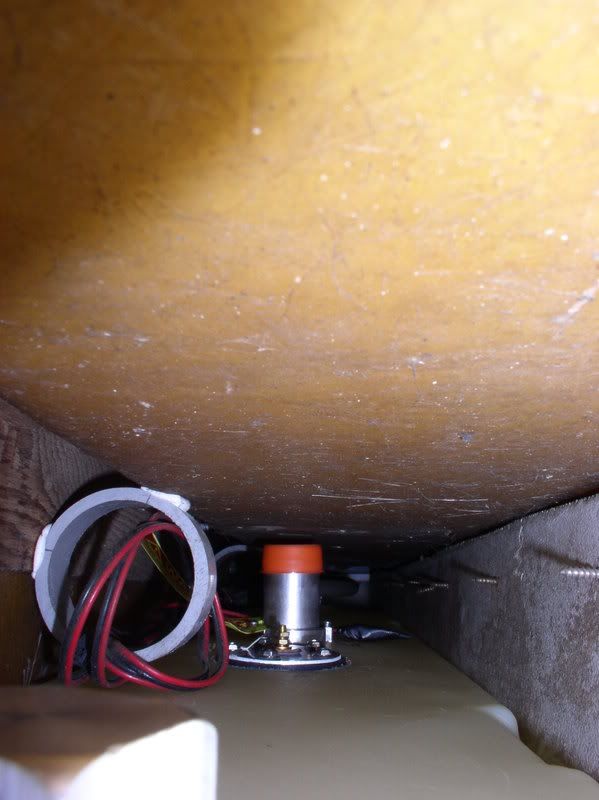 As you can see, there is no room for the filler neck and something has to be done about strapping it in. There was no way the 24 gallon would have fit without major modifications. Figured all I had to do was relocate the filler neck, build up the filler location and maybe everything would fall in place, oh donít forget the strapping for the tank. Had to make brackets out of stainless and insulate with cutting board material bent with a heat gun to fit. 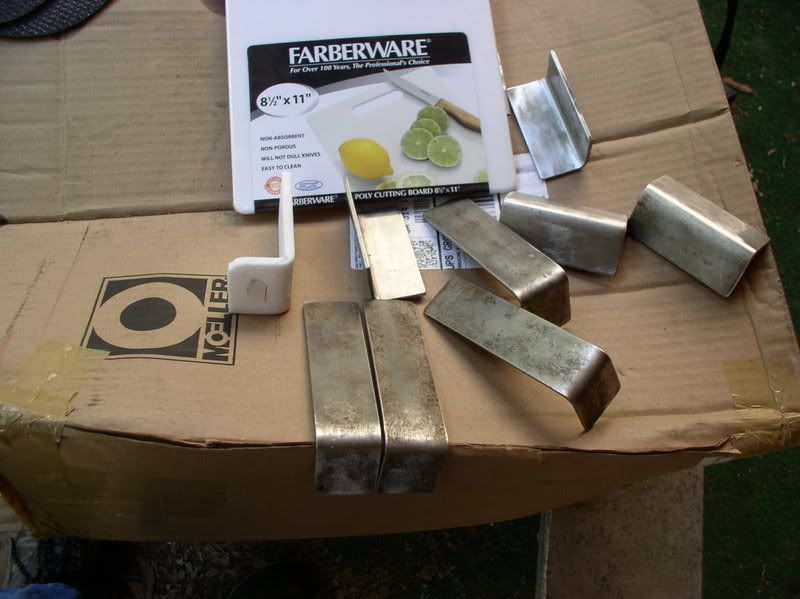 In order to have a filler location and not a flag pole sticking up, I had to do a couple of things that would prevent double clamping the filler hose (as per USCG reg # kissmyass). Had to cut off the filler neck a little. Make a couple of shims out of Starboard and then assemble all of them. 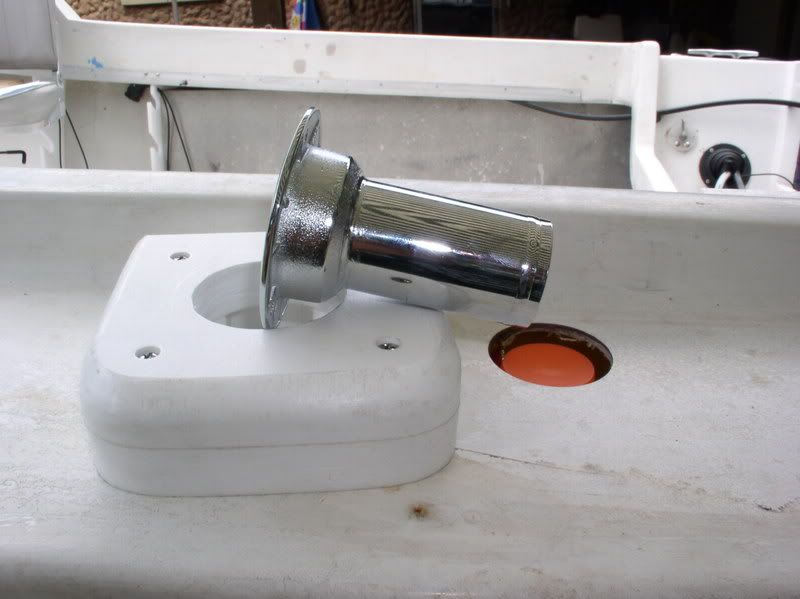 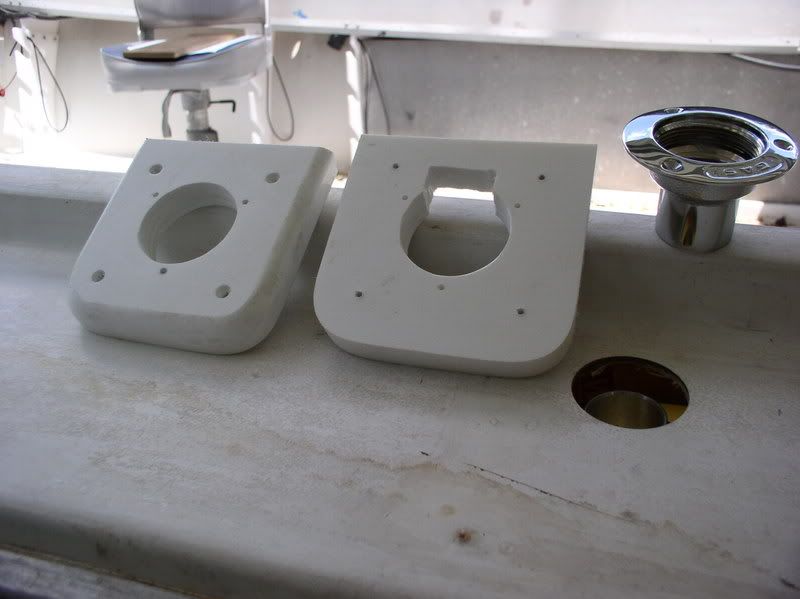 There was a peck order that had to be followed to assemble this crap. Had to bolt down the lower portion of the filler support shim.  Then after cutting the hose the right length, attach it and tighten to the filler, put the tank in place, then put the clamp in place to slip over the neck in the tank. 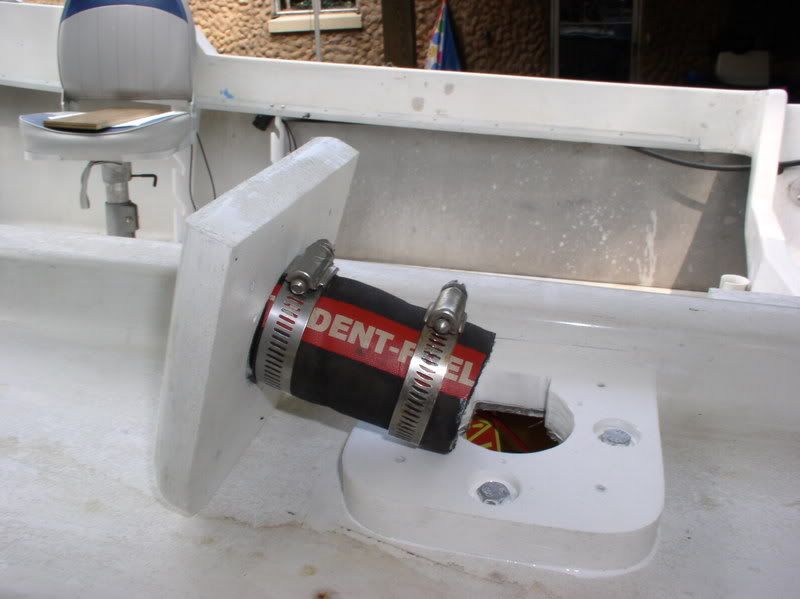 This is the ruff finish (probably as good as it will get) of the filler location.  The strap locations after welding and bending the insulating materials. 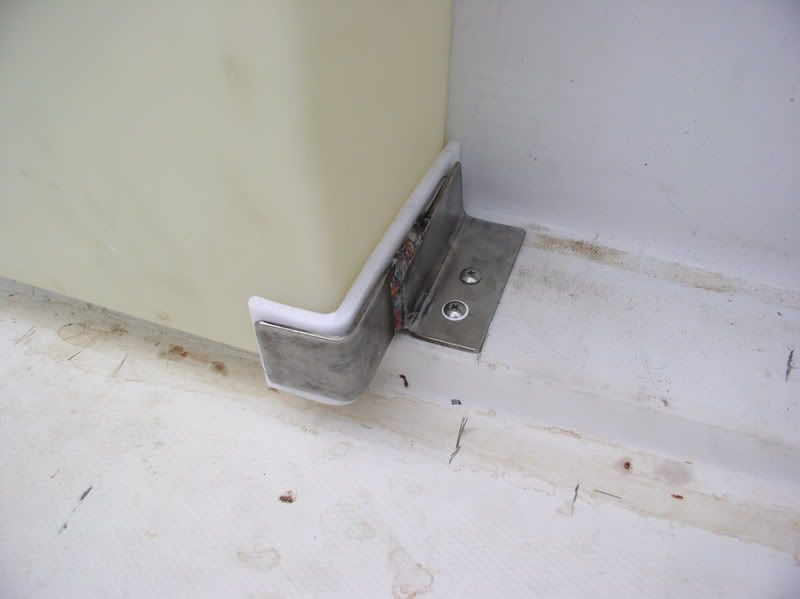 And we had a little of space left over between the old tank location and the rodholders.  If any of yaíll have to go thru this crap that needs saddle tank replacement, it might be better to have some replacement tanks made instead of going thru this turmoil. I didnít feel comfortable about replacing with a used tank of the same era, just me. Didnít want to tackle the starboard one till I had to. The steering would have to be relocated, and God knows what else!!
__________________
 '75 Cuddy with '00 Johnson Ocean Pro 150 horse Benny |
|
#2
|
|||
|
|||
|
Looks like you did a fine job!
__________________
*************************************** Stay Safe!  Sold - 1984 V-20 Cuddy with a 2003 Johnson 140 hp gas sippin 4-stroke. 1995 Ranger 250C with a 2015 Suzuki 300 hp 4-stroke. |
|
#3
|
||||
|
||||
|
Well done and quite inovative. Good Post!
__________________
Matt Veneman--AKA Overboard--1989 Wellcraft V20 Cuddy |
|
#4
|
||||
|
||||
|
nothing wrong with that install!!
   Great job!!
__________________
1986 V20  Old Fishermen never die, we just SMELL that way!! |
|
#5
|
||||
|
||||
|
I thought because of availability it would be a drop in, but nooooo.
Daddy , the whole time saying, "snatch both of them out and put a surface tank on the floor". I'd prefer to have the floor uncluttered, at least this way I gained a little room near the rodholder and didn't sacrifice but 2 gallons in doing so.
__________________
 '75 Cuddy with '00 Johnson Ocean Pro 150 horse Benny |
|
#6
|
||||
|
||||
|
Nice job...I was faced w/same problem back in '99 when I did mine...talked to Wellcraft and they were pretty stern about not tryin' to add belly-tank to my '74 hull...so I took another route and went from 40 to 80 gal capacity
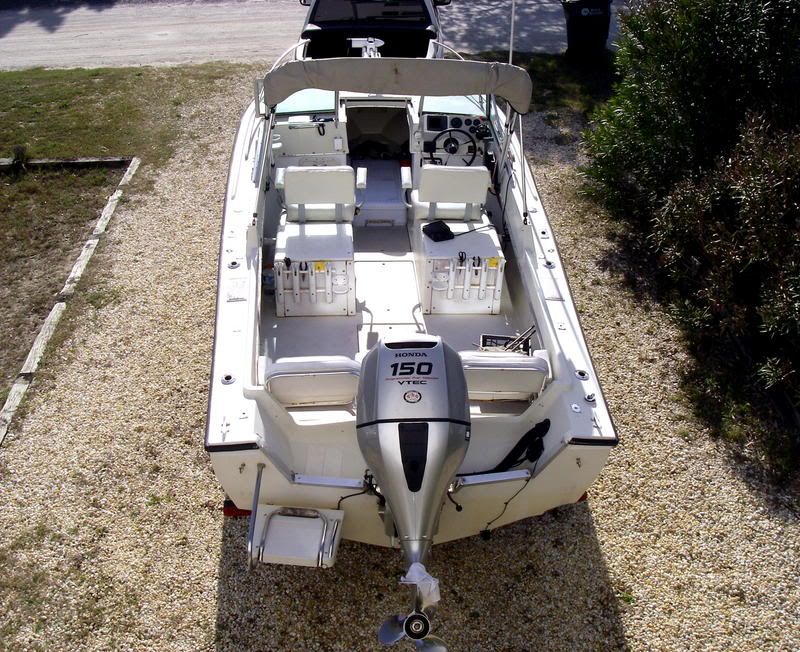 40 gals under each seat box...still haven't blown my *** up!!... 
__________________
'74 V-20/ BF 150 '95 V-21/ BF 150 '84 V-20/ 200 2.4 Merc '87 V-20/'18 F150 Yamaha 
|
|
#7
|
||||
|
||||
|
hey tsub, looks pretty dam good.
did you do one or both? (and yer gay)
__________________
hammer aint. stinkpot aint. sawdust aint. rainbow aint. maco sure as sh!t aint. randle? ha ha ha. 
|
|
#8
|
||||
|
||||
|
Thanks, sweetness.
Just did one, didn't see the need fix what wasen't broke yet. And reel, yours is the way to go if more than 36 gallons is needed. I don't intend going farther than 15 miles offshore. To the sound is 15 miles from the house. So figure a reach of about 45 miles and back.
__________________
 '75 Cuddy with '00 Johnson Ocean Pro 150 horse Benny Last edited by tsubaki; 08-17-2008 at 08:41 AM. |
|
#9
|
||||
|
||||
|
Oh and MJ will appreciate this!!
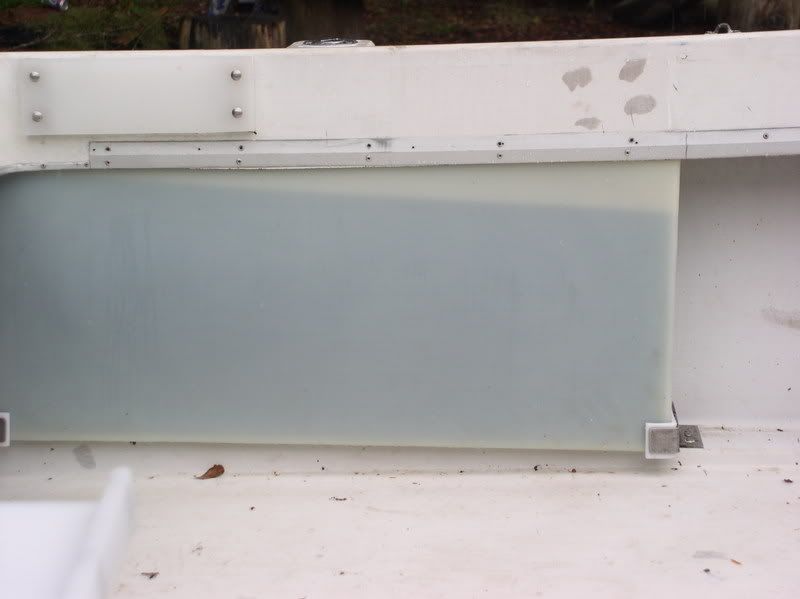 No electrical gauge needed, just look and see the gas level!!
__________________
 '75 Cuddy with '00 Johnson Ocean Pro 150 horse Benny |
|
#10
|
||||
|
||||
|
Yes I like that very much!! But my tanks had covers on them to hide the tanks and to protect them.
I would want to cover the plastic tank for sure, just for protection! when full of gas they are more flexable then empty and I would not want to see it get punctured! Some how? Mine was coverd in 3/8 startboard, worked perfect! Could even ciut a window to still be able to see the gas level!!
__________________
1986 V20  Old Fishermen never die, we just SMELL that way!! |
 |
| Tags |
| saddle tank replacement |
|
|